Gorilla Guide: Essential Steps for IoT Success
** Note: This post was written by Gorillas Christopher Valerio and Fabian Montealegre
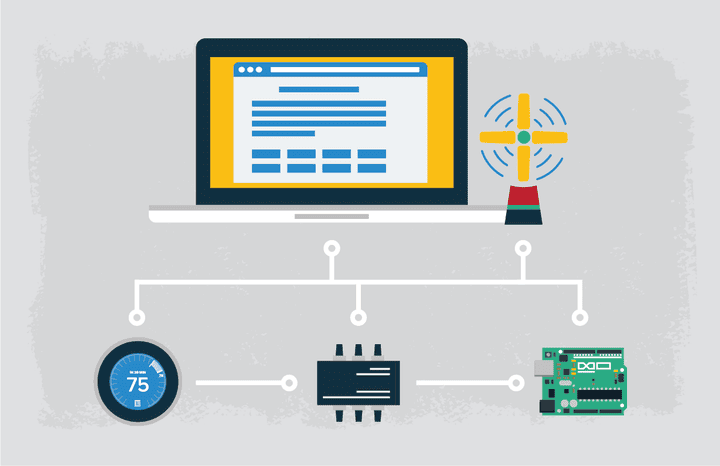
Internet of Things (IoT) connects every aspect of our lives to the cloud. We don’t just share cat pictures and baby videos anymore, we live like the Jetsons! In this post, we introduce how to set up an IoT project. In our second Gorilla Guide to IoT post, we’ll explain the electronics of the thermostat and fan, which parts are needed, and how to connect everything through a tutorial.
A Relatively Simple Problem to Solve
To demonstrate our IoT skills, a small band of Gorillas took on a simple problem: What is the most effective way to heat or cool a room based on current ambient temperature? You may ask why we would want to do something that is already done by basic thermostats everywhere? Because it is a well known and straightforward problem to solve.

Gorillas Chris and Fabian get ready to tackle IoT
As we dove deeper into the solution, we decided to base a series of blog posts on our findings. The series will describe Amazon Web Services’ IoT, the tech stack we chose and reasons for doing so, and our final proof of concept using Arduino devices to simulate a heating and cooling system.
Once we decided on a problem to solve, the fun began…
With a blank canvas, we set out to determine which hardware and software we should use.
While looking for hardware, we wanted to use something inexpensive, but powerful enough to get the job done. Luckily, Arduino YÚN is the perfect microcontroller for this type of project. It’s easy to get and well documented. We also considered using Raspberry Pi, but it has a lot of extra features that we didn’t need. Amazon even provides an AWS IoT Arduino Yun SDK, so we only needed to focus on creating our app instead of trying to make the devices communicate with IoT. That made the next decision even easier: use Amazon Internet of Things as the cloud provider.
Why Deploy Amazon Internet of Things?
One issue is security, and thankfully, Amazon Cloud now provides a service platform that helps developers control IoT devices securely and efficiently.
What does AWS IoT provide? Quoting Amazon documentation:
“AWS IoT enables secure, bi-directional communication between Internet-connected things (such as sensors, actuators, embedded devices, or smart appliances) and the AWS cloud over MQTT and HTTP”.
MQTT
AWS IoT provides a MQTT service. MQTT is a lightweight publish/subscribe messaging protocol built for the Internet of Things. It enables Machine-2-Machine communication, making it perfect for devices with low hardware and network resources.
Device Shadows
AWS IoT implements device shadows or thing shadows that are a JSON document that describe the current or desired state of a device. The Thing Shadow service maintains a thing shadow for every device connected to AWS IoT. This thing shadow can be retrieved using MQTT or HTTP. To learn more about thing shadows, we recommend checking this link and the official docs.
AWS IoT Configuration
First, you must have an active AWS account. Go to https://aws.amazon.com/ and choose “Create an AWS Account”. Next, set up your AWS IoT environment.
IAM setup
If you are not the admin of your account, make sure you have enough permissions to be able to work with AWS IoT.
AWS IoT Certificate and Policy
First, create a certificate and policy to troubleshoot and work with device shadows using MQTT.fx. Certificates authenticate and authorize any device that wants to connect to AWS IoT, not just your “things”. On the first screen, click “Get started”.

Next, create a new certificate. Go to “Security” -> “Certificates” and click “Create certificate”. The next view will show 3 options. Click on the “One-click certificate creation” option. You will see the following:

THIS IS VERY IMPORTANT: You must download the certificate now. Public key is not going to be used for things, or MQTT.fx, but it is a good practice to download it. Download all items from this page. Once done, click “Attach a policy”.
A policy is a set of permissions that a thing or client will perform and must be attached to certificates. Click “Create new policy”.

Next, name your policy. Type “iot:” and AWS will autocomplete. You will use “iot:*” for “Action” and “*” for “Resource ARN”, so that you can test all scenarios. To complete the process, click “Create”.

Next you will see an overview page:

Go back to “Security” -> “Certificates” and click in the “ Inactive” certificate. Finally, select the name of your policy (in case it isn’t already checked, so that the certificate is usable) and click “Attach”.

Use MQTT.fx to test Configuration
MQQTT.fx simplifies the process because it tests MQTT configuration. Download it here. Once installed, use the recently created certificates to configure MQTT and start testing AWS IoT.
To create a new configuration for AWS, click on the gear icon, next to “Connect” button. Next, click the plus button on the bottom left, to add a new profile. Set a name for the profile. For the “Broker Address” field, enter the AWS IoT endpoint. You can check this in “Settings” on the AWS Dashboard. The “Broker Port” must be 8883, which is the SSL enabled port.
Click on the SSL/TLS tab to set up certificates for AWS. Check “Self-signed certificate” and the downloaded certificates from the previous steps. “CA File” is the AWS’s Certificate Authority. “Client Certificate File” is your -certificate.pem.crt file and “Client Key Password” is the -private.pem.key. Check “Pem Formated” option too.

The endpoint is found, but you could also use AWS Cli:
$  aws iot describe-endpoint

    {
            "endpointAddress": "a276znh1wuhoiz.iot.us-west-2.amazonaws.com"
    }
To test the connection, select your new profile, and click on “Connect”.
MQTT is a sub/pub server. To test, you can subscribe to a topic (we called ours testTopic) and publish some data to it.


Now that you have your AWS IoT environment ready, it’s time to start working with the Arduinos.
Arduino Yun
There are many options for IoT projects. See Amazon recommendations here. We chose Arduino Yun because of the price, but also because we wanted to use a well-known device that supports wifi by default and has support for AWS IoT SDK. First, to setup wifi on the Arduino Yun, follow the guide on Arduino site: link. Also, be sure you have Arduino IDE: arduino IDE.
Then, to install AWS SDK for Arduino, download it from github:
git clone https://github.com/aws/aws-iot-device-sdk-arduino-yun.gitCheck if you have expect. :
which expect
     /usr/bin/expect
Use the same process as on AWS IoT configuration, and copy them into AWS-IoT-Arduino-Yun-SDK/AWS-IoT-Python-Runtime/certs.
Open a new terminal and go to AWS-IoT-Arduino-Yun-SDK and run:
chmod +x AWSIoTArduinoYunInstallAll.sh
    # If you haven't done the Yun configuration please do it.
  ./AWSIoTArduinoYunInstallAll.sh <Board IP> <UserName> <Board Password>
Now Copy and Paste AWS-IoT-Arduino-Yun-SDK/AWS-IoT-Arduino-Yun-Library to your Libraries folder, this is commonly found on ~/Documents/Arduino/libraries on MacOS and on ~/Arduino/libraries.
You are now ready to start developing an IoT project!

In our next Gorilla Guide to IoT post, we’ll explain the electronics of the thermostat and fan, which parts are needed, and how to connect everything. We will also explain how to start reporting data to the cloud, and set up rules to work with the data recorded. We’ll also discuss the backend server developed on Go and a dashboard app built with React and MaterialUI. We’ll share code snippets and hints on how to do most of the heavy lifting development, so stay tuned!
—

