How to Use Google Tag Manager: A Tutorial
In this post, I’ll give you an in-depth tutorial on how to use Google Tag Manager (GTM), one of the most popular Tag Management Systems (TMS) available. Marketers and developers use tags, or pixels, on websites to collect information about visitors to the website and their behavior related to the website. Many websites have many tags deployed, all designed to optimize the customer experience.
A TMS can help reduce complexity, increase website performance, improve data governance and control, streamline data integration, and much more. GTM is a JavaScript library with an additional management user interface that allows you to manage and deploy tags on your website or mobile app without having to update your code. After completing this Google Tag Manager tutorial, you will be able to manage all your tags in the same place and you will be able to forget about deployments because of changes related to tracking tools.
Understanding the Basic Components of GTM
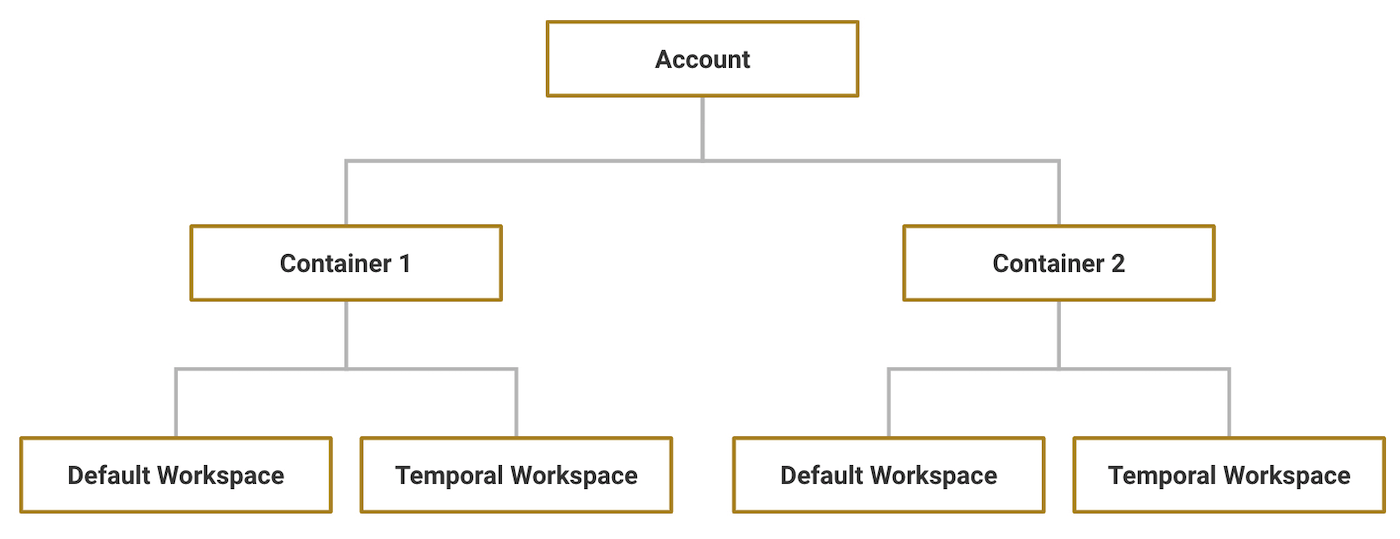
To make the best use of GTM, you need to understand accounts, containers, and workspaces.
What Is an Account?
Accounts are a way to encapsulate containers. You can create multiple accounts from a single Google Account, but usually you will have just one account per organization. If your organization is very big or has multiple divisions, it may make sense to create as many accounts as you need.
What Is a Container?
A container is a place where you add tags. You have to have a container because it is what GTM uses to load tags into a page on your website. For this reason, GTM will require that you create a container when you create an account.
GTM containers are similar to code repositories. Containers allow you to keep all your tags, triggers, and variables together; you can even have versions of containers.
What Is a Workspace?
Workspaces allow multiple team members to work on the same container simultaneously.
Each container has a default workspace and it is the one that should have the live setup or the setup that is ready to be published. The default workspace is very similar to a master or production branch.
When several people are working on the same container at the same time, there might be conflicts, like overriding the work of another team member. To avoid this, it’s a good idea to create a new temporal workspace each time you work on a new set of changes. Once the changes are ready, you can merge them into the default workspace, which will create a new version.

What Is a Tag?
A tag is a snippet of code provided by a vendor to integrate their products into your website. They are typically used to send measurement information (for example, page views) from an app to a third-party tool like Google Analytics.
What Is a Trigger?
A trigger is used to listen to certain types of events that occur on a website. Triggers are needed to fire tags. Installing GTM on your website is not enough to execute tags because they fire in response to events.
There are many types of triggers such as page views, button clicks, form submissions, and many more. For example, if you want to fire a tag when a submit button is clicked, you can choose a trigger of type “Click.”
What Is a Variable?
Variables are used to store information that can be referenced or manipulated later. They can be used both in tags and triggers. There are two types of variables:
• Built-In variables: Built-in variables come pre-configured and can’t be customized. For example, if you want to check the page URL on a trigger, you can use GTM’s built-in variable to do this.
• User-defined variables: GTM allows you to create custom variables. Newly created containers won’t have user-defined variables until you create them.

What Is the Data Layer?
The data layer is a JavaScript array used to pass information from your website to your GTM container. Unlike tags or triggers, the data layer can be used from your code. For instance, some events are hard to track from GTM, like a request response. With the data layer, you can push any kind of information that you can use later to populate variables and activate triggers.
Do You Need Technical Knowledge to Work with GTM?
Non-technical users can use GTM, but there are a number of reasons why you’ll find that technical knowledge allows you to make more effective use of it:
• GTM is a JavaScript library itself, so you will need to know JavaScript if you want to make the most of it.
• You can use regular expressions and CSS selectors as operators in trigger filters. It would be hard to make use of this powerful capability if you don’t have technical knowledge.
• You can create custom tags with JavaScript, and remember that tags run on your website. If for some reason you have issues with your custom tags, you will also have issues on your website. It would be very easy to create significant issues with your production website if you don’t have JavaScript skills.
• Tags can be very complex. It’s important to understand all the tools you add to your website, as well as how they interact with each other. If you add multiple tags at the same time without understanding how they work together, you may create significant performance issues.
Using GTM: A Step-by-Step Tutorial
Within this Google Tag Manager Tutorial, we will set up a simple Google Analytics Page View Tag. The two pre-requisites to complete this tutorial are:
• A Google account.
• A Google Analytics account that is set up with your Google account. (Note that Google Analytics is out of the scope of this article; if you don’t have a Google Analytics account, please create one and get your Tracking Id).
Step 1: Create an Account and a Container
The first step is to create a GTM account:
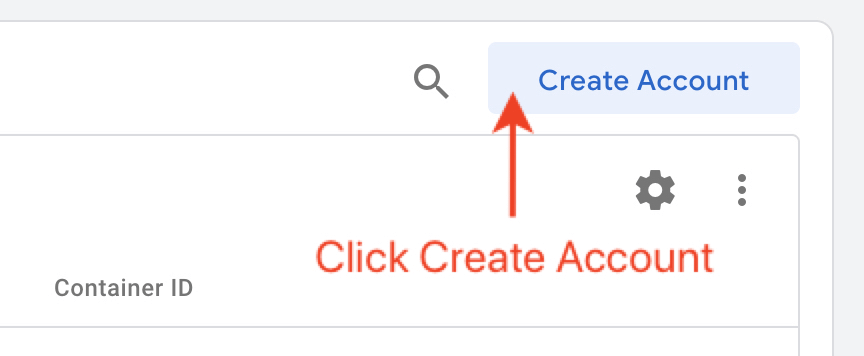
1. Go to https://tagmanager.google.com/ and log in with your Google account.
2. Click Create Account.
3. Then, follow the steps described in the screenshot below.
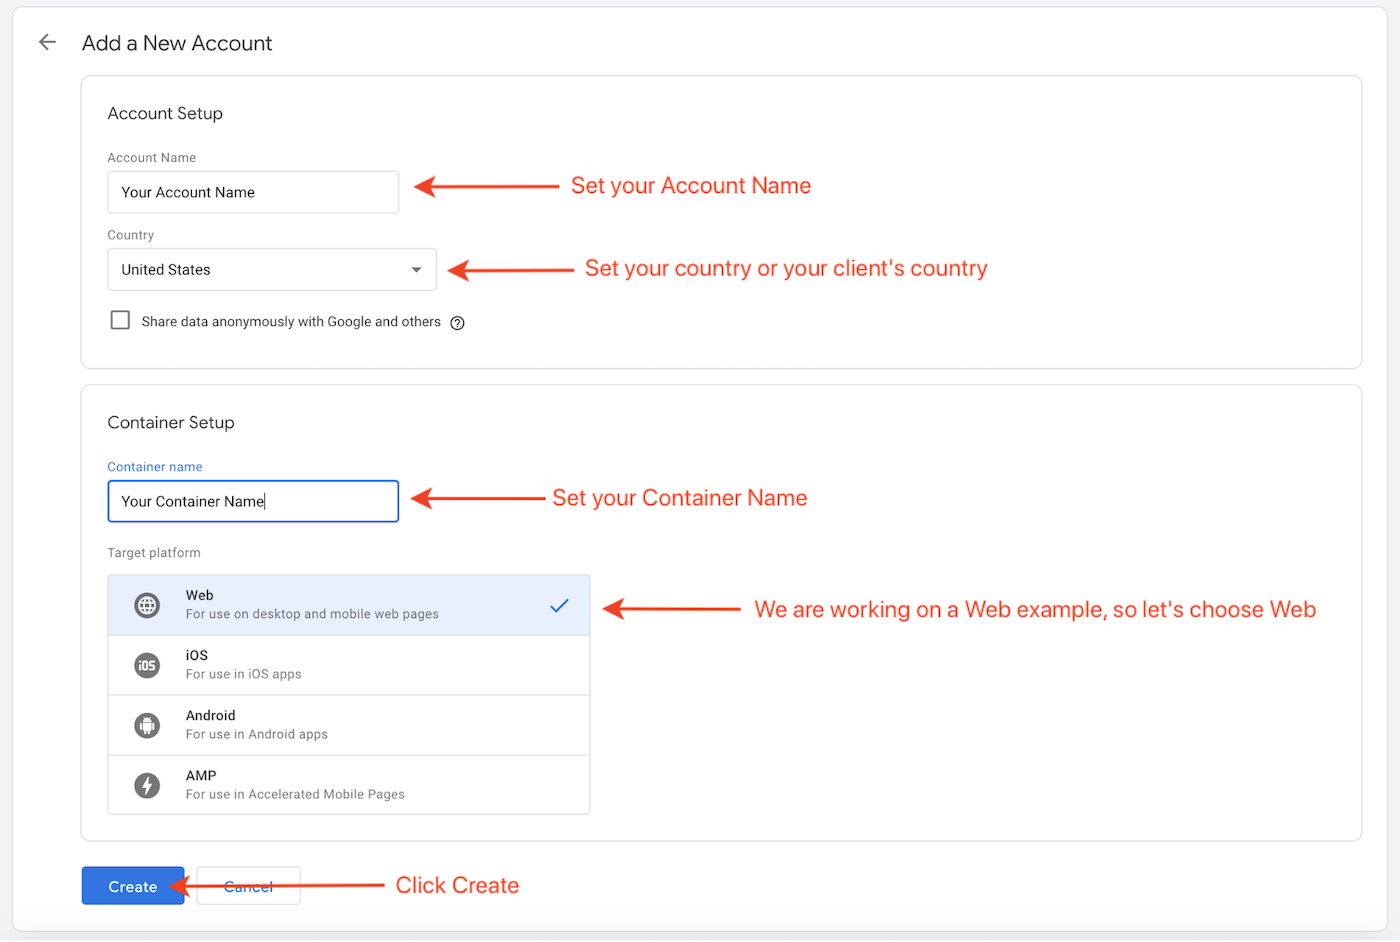
As you might have noticed, you must create a container when you are creating the account. (Note that you can create more containers later.)

Step 2: Install GTM on your website
Installing GTM on your website is a very simple process:
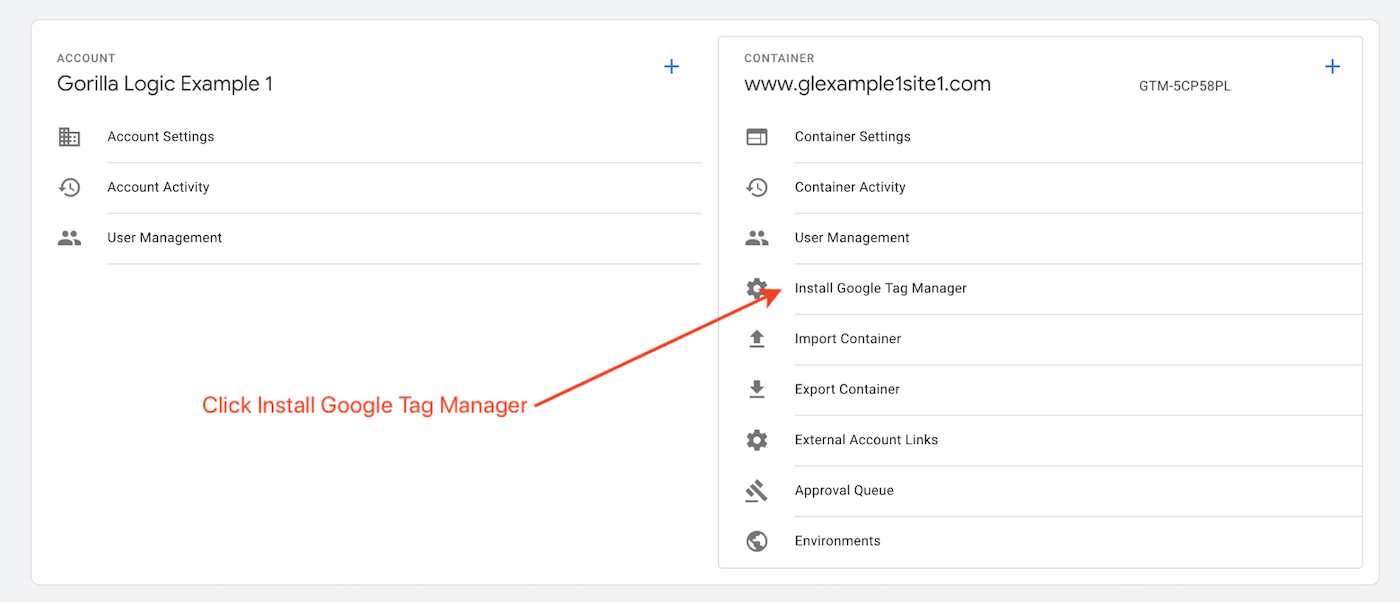
1. Go to your container and then click Admin.

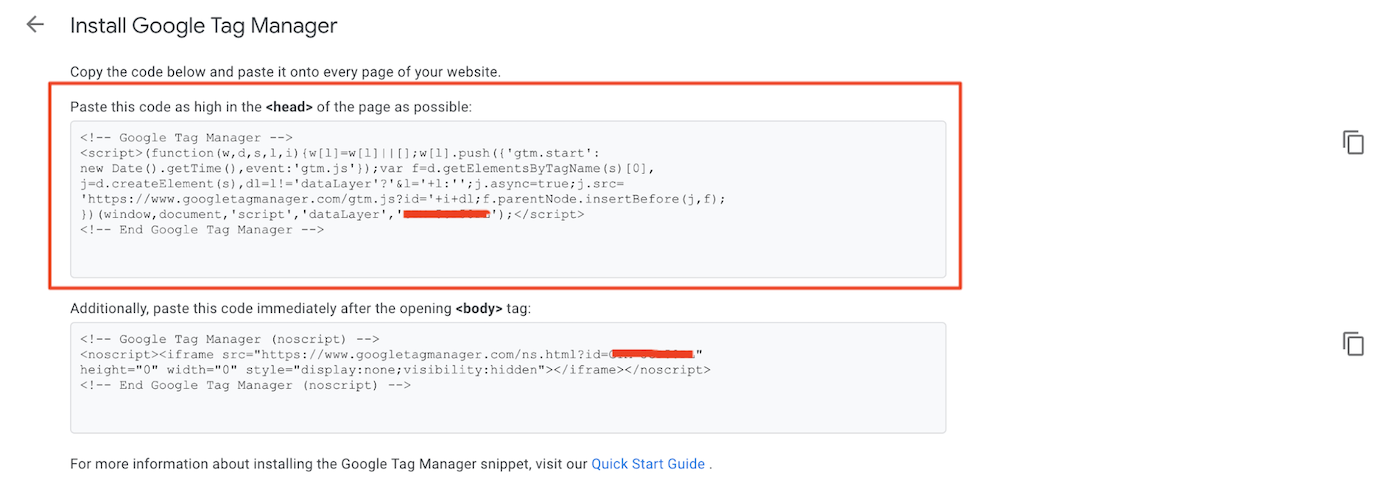
2. Click Install Google Tag Manager.
3. Copy the first snippet and paste it as high in the head of the page as possible.
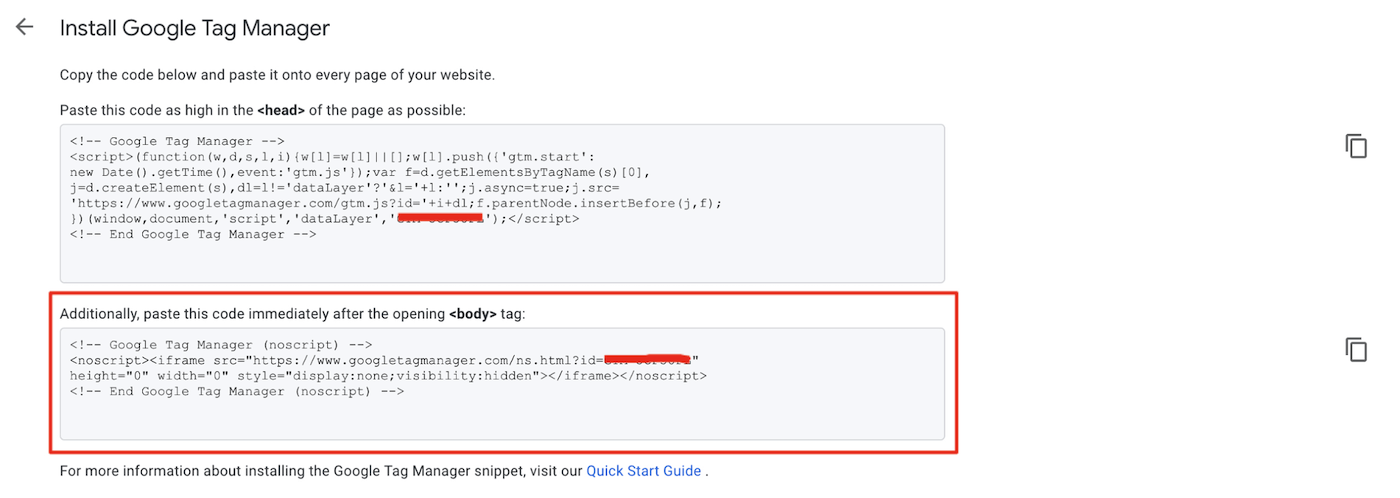
4. Copy the second snippet and paste it immediately after the opening of the body tag.
Step 3: Create a Workspace
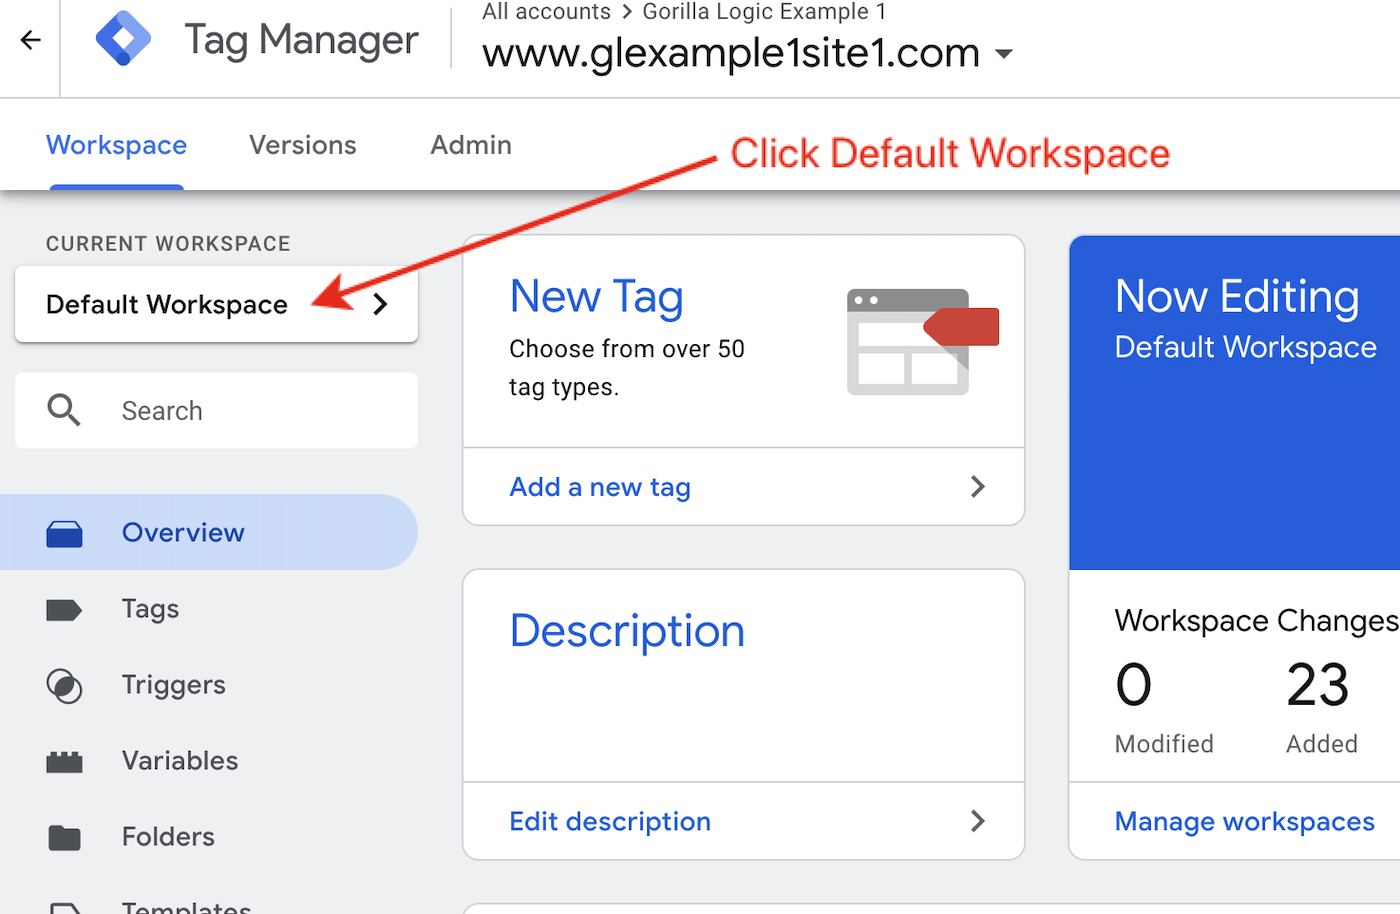
1. Go to your container and click Default Workspace.
2. Next, you will see a list of your workspaces. At this point, you should only have the Default Workspace. Click the Plus icon.

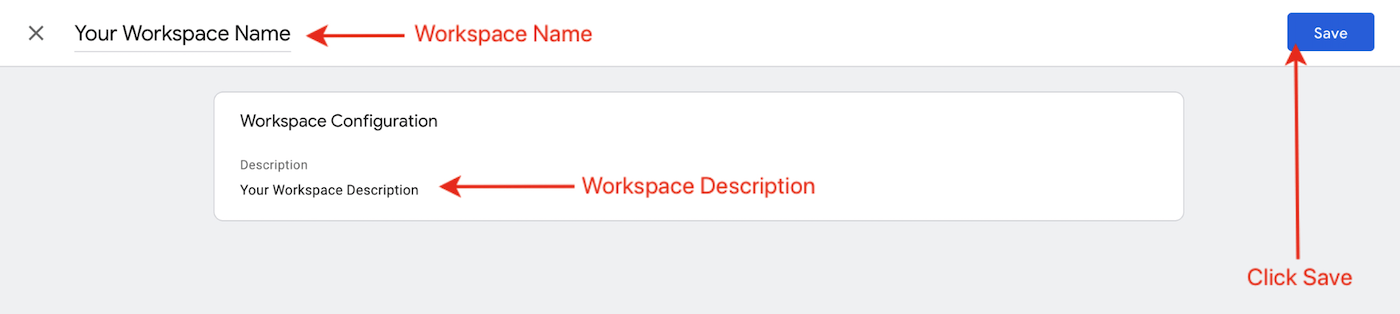
3. Finally, set a name, a description, and then click Save.
Step 4: Create a Variable to Store Your Google Analytics Tracking ID
1. First, make sure to choose the workspace you just created.
2. Click Variables on the left panel.

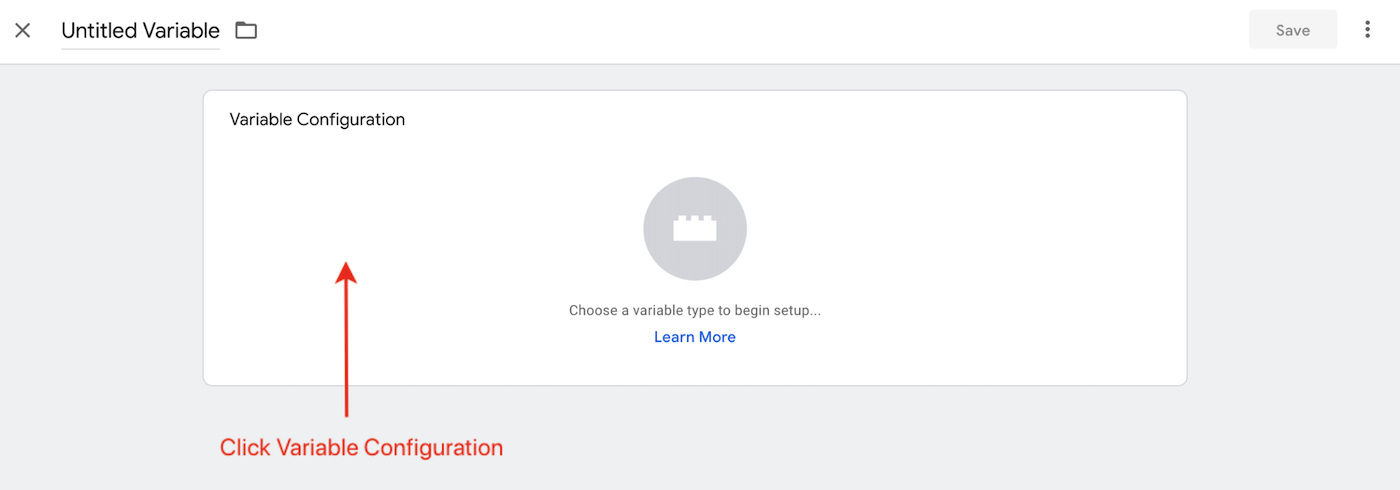
3. Now create a User-Defined Variable. Click New on the User-Defined Variables section.
4. Click Variable Configuration.
5. Choose the Variable Type “Google Analytics Settings.”

6. Set a name and then paste your GA Tracking ID in the Tracking ID field.
7. Click Save.

Why Are We Creating a Variable to Store the Tracking ID?
You can have multiple Google Analytics tags in your container. Each of these tags needs a Tracking ID. To avoid repeating the Tracking ID in every tag, and also to keep the consistency between the GA tags, it’s a good idea to create a variable to store this value.
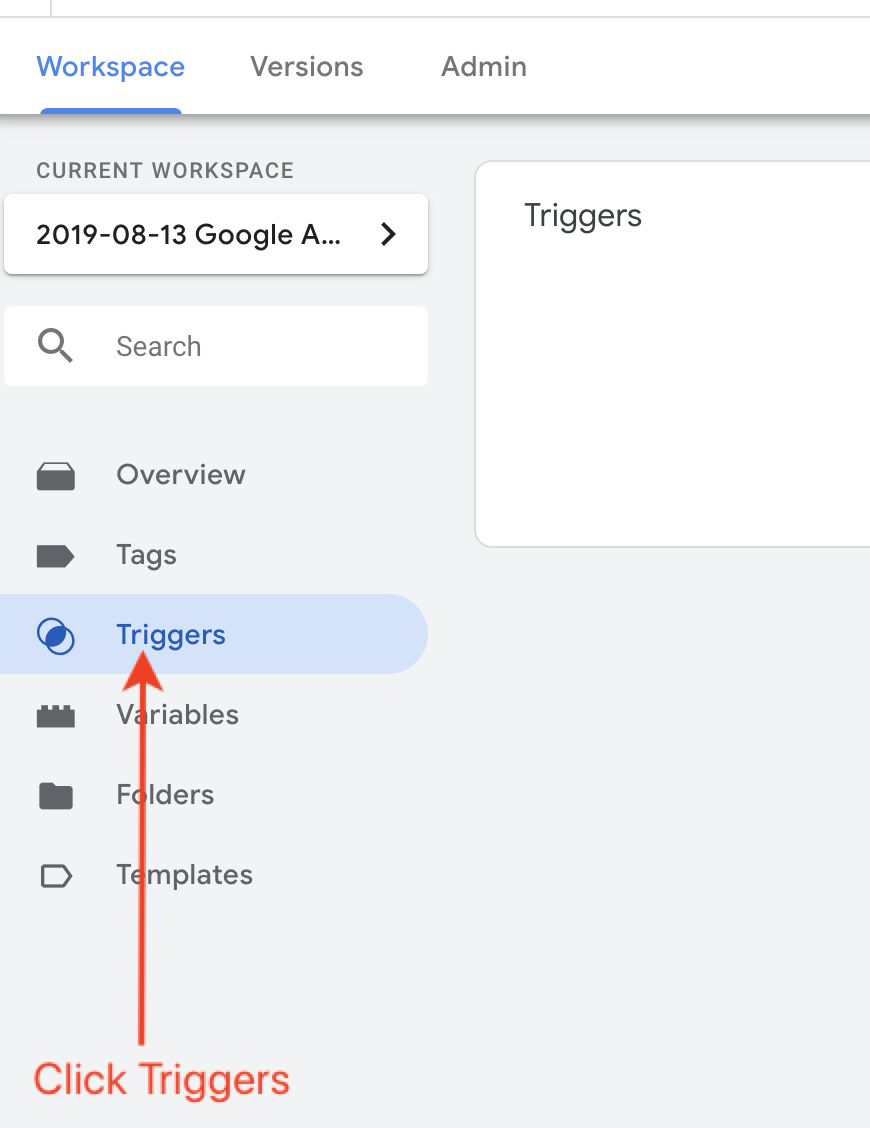
Step 5: Create a Trigger to Fire Your GA Page View Tag
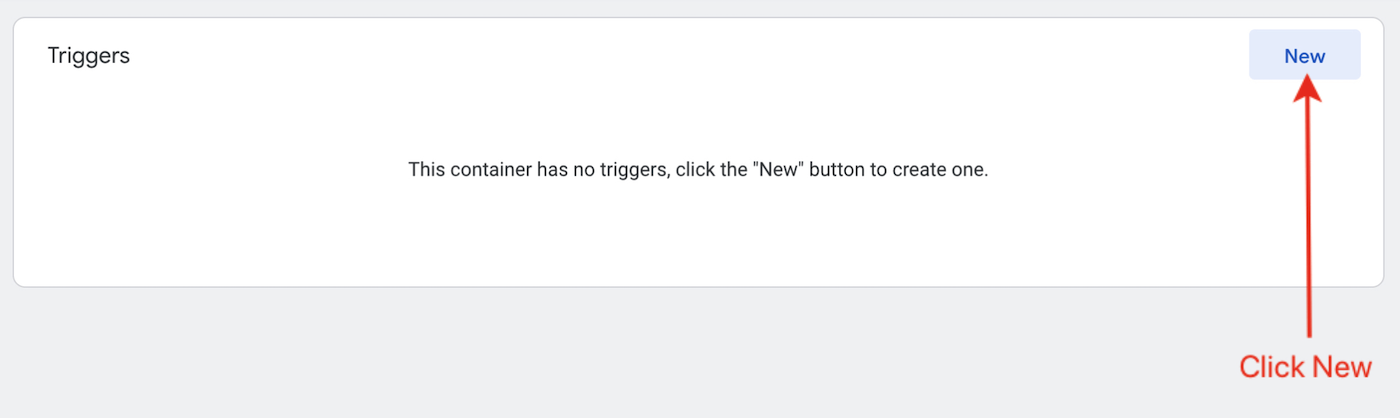
1. Click Triggers on the left panel.
2. Click New.
3. Click Trigger Configuration.
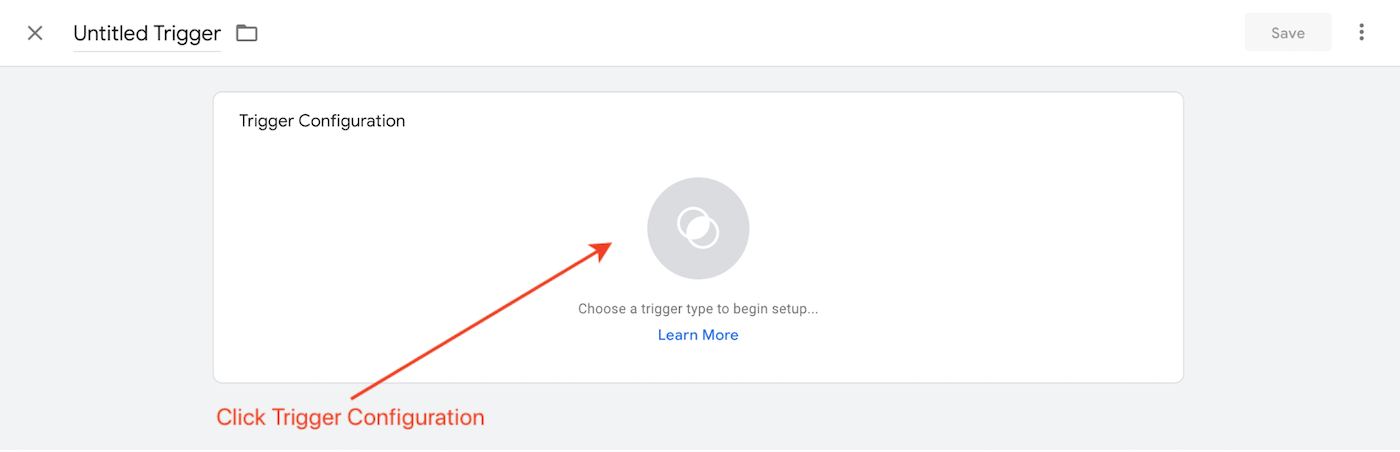
4. Choose the Trigger Type “Page View.”

5. Set a name and click Save.

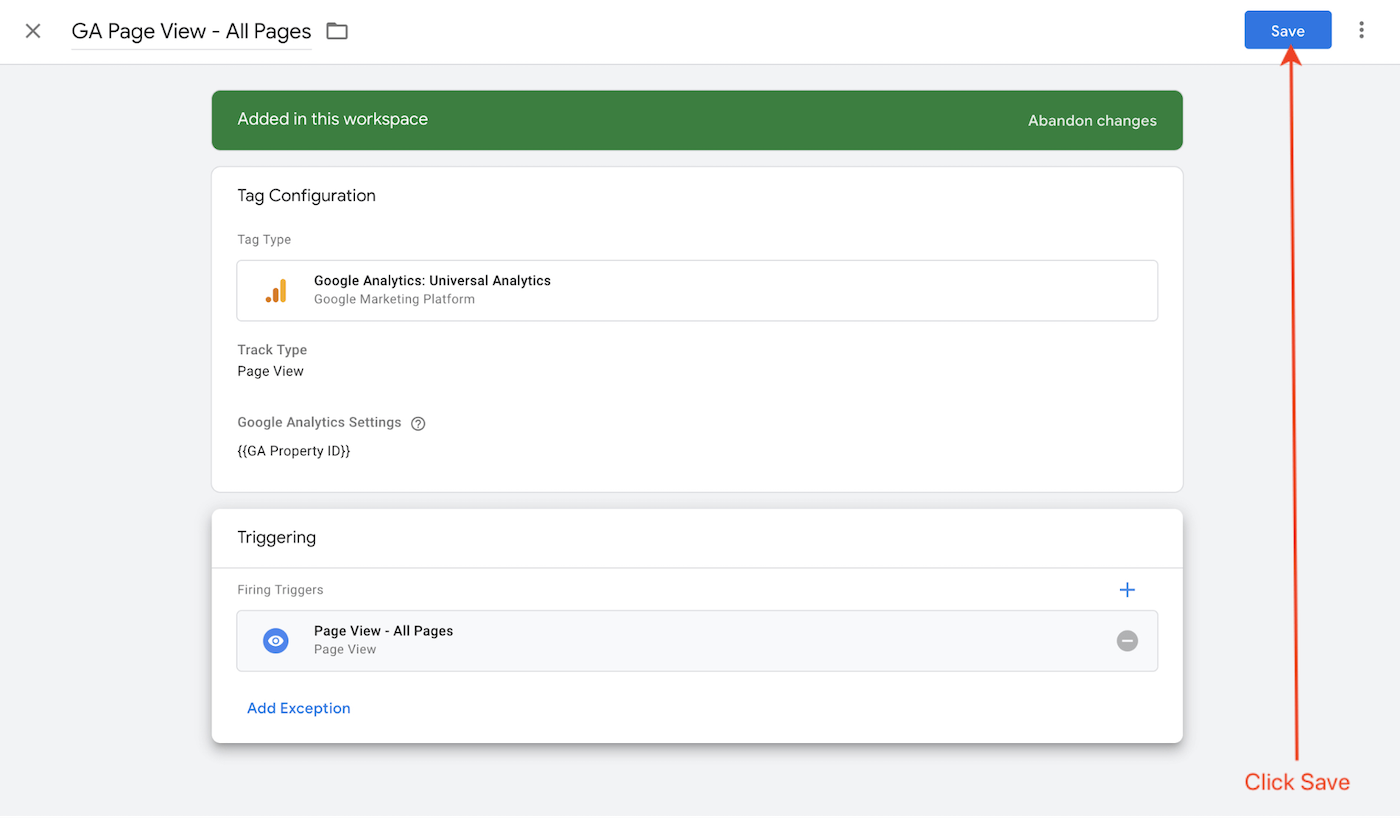
Step 6: Create a Google Analytics Page View Tag
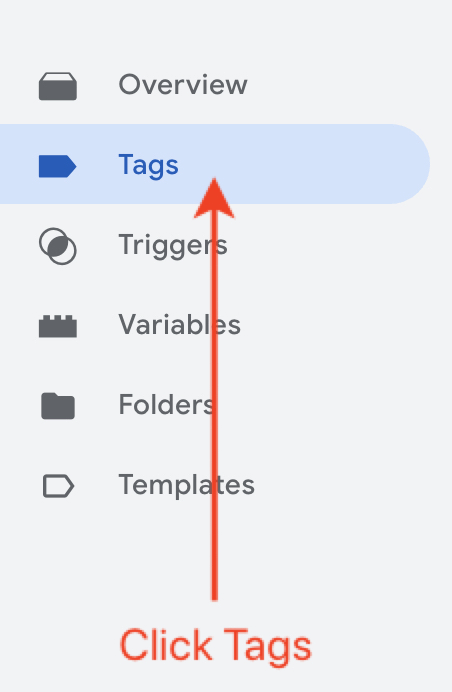
1. Click Tags.
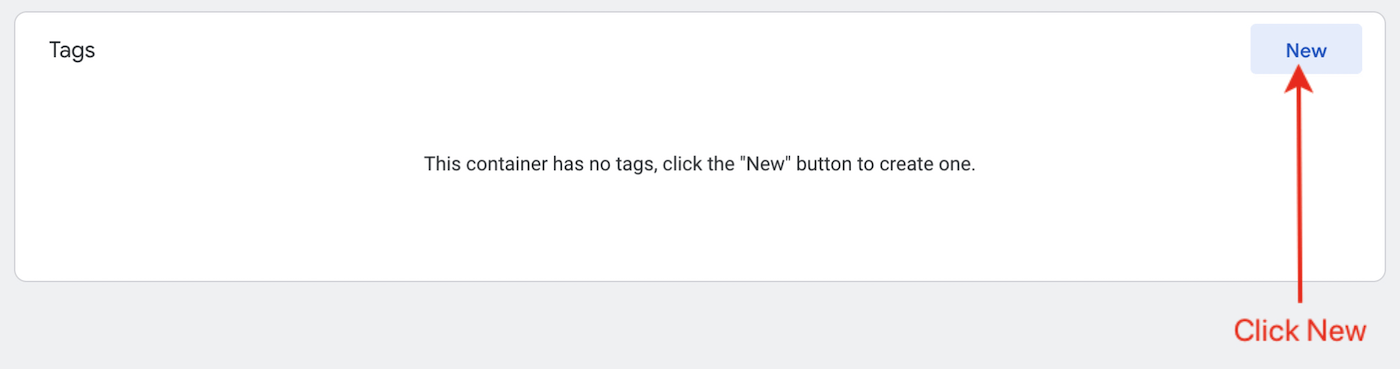
2. Click New.
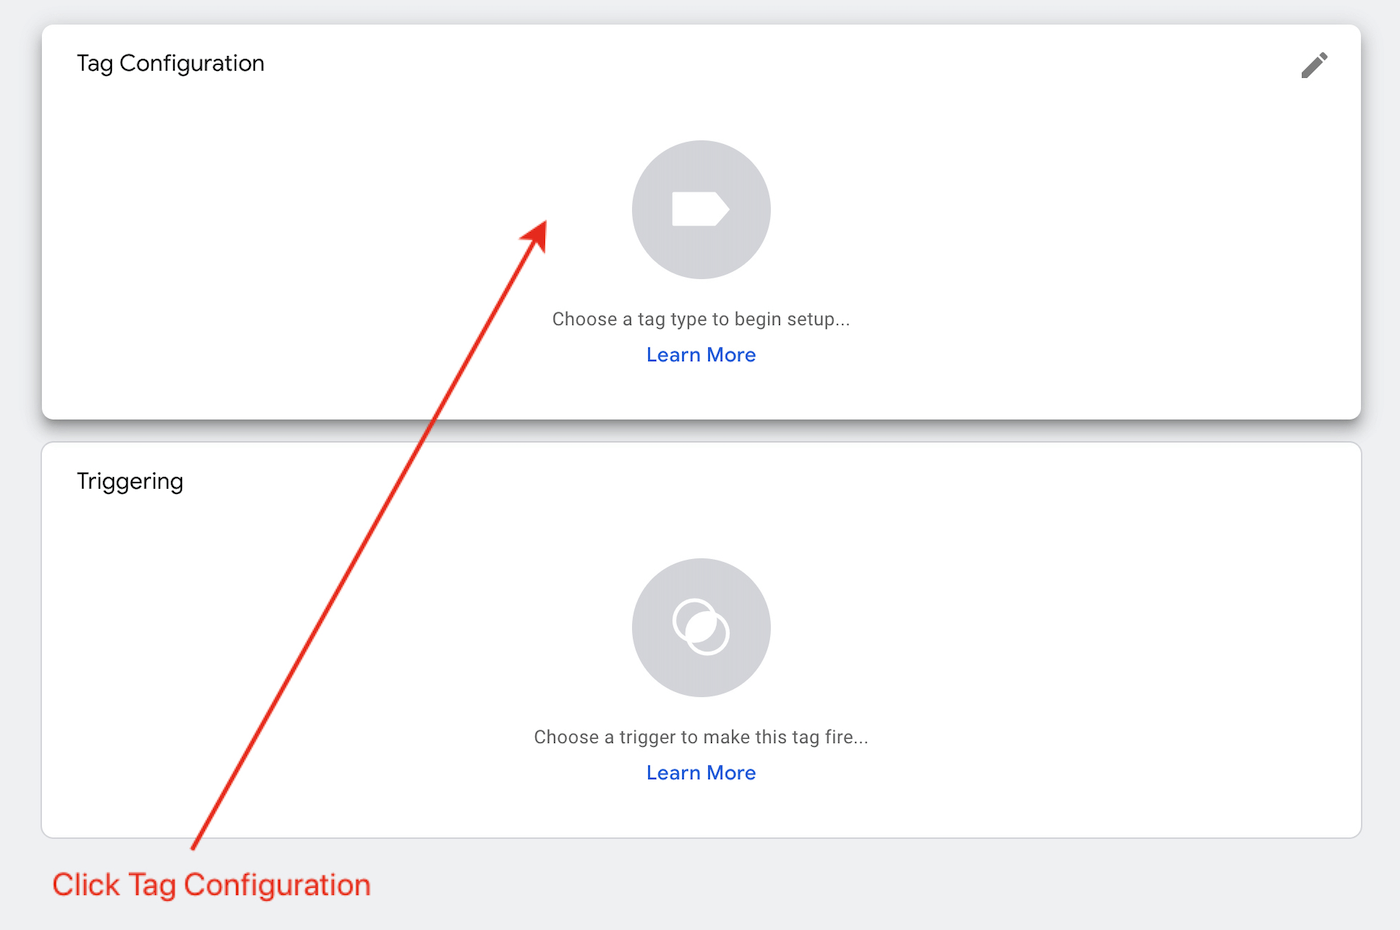
3. Click Tag Configuration.
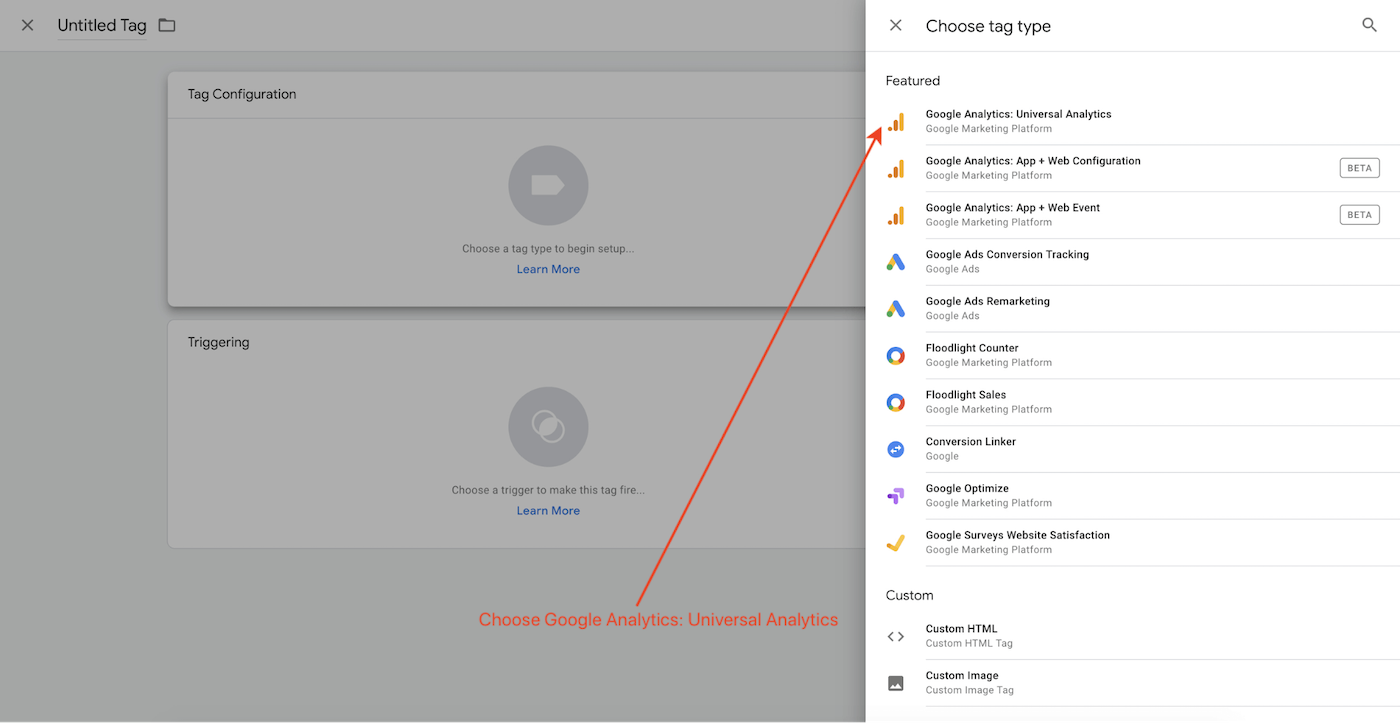
4. Choose Google Analytics: Universal Analytics.
5. Set your Tag Name and choose the Google Analytics Settings Variables created on step four. Choose the Trigger that will fire your tag.

6. Choose the Trigger we created in the previous step.

7. Click Save.
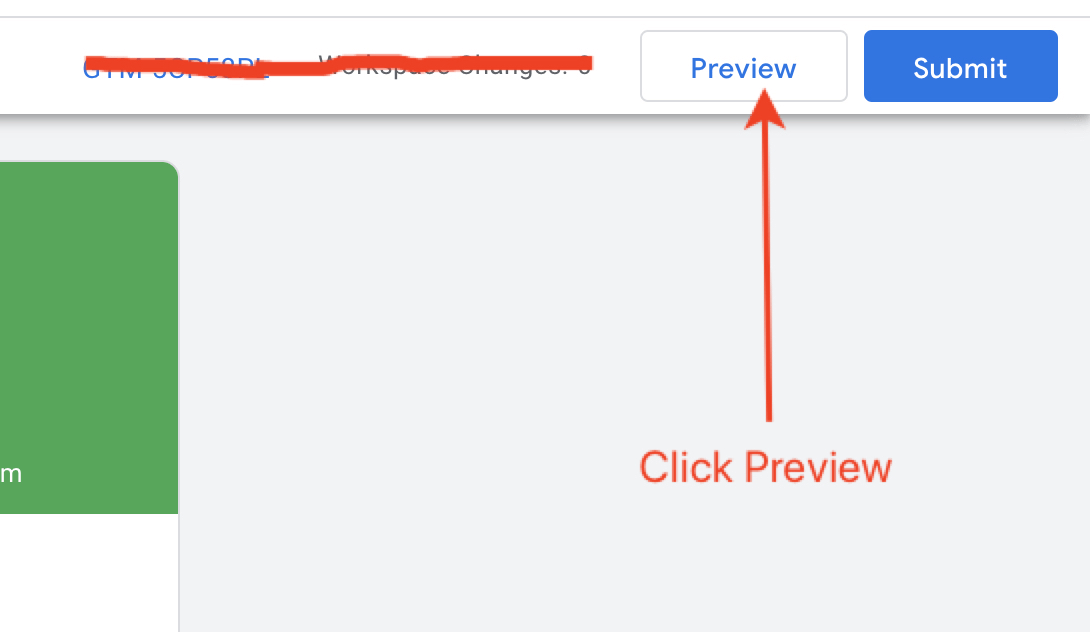
Step 7: Debug with the Preview Mode
Before publishing your changes, make sure your setup is working properly.
1. Click Preview.
2. Go to your website and refresh the page (you might need to clear the cache). Now you should see the debugger.

If everything is working correctly, your new tag should appear in the Tags Fired section. Now you are ready to publish your changes.
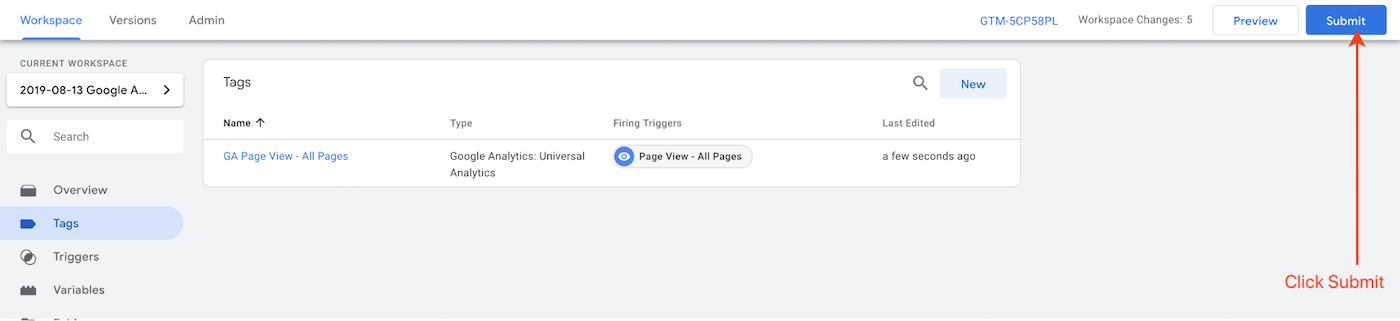
Step 8: Submit Your Changes
1. Click Submit.
2. Set your Version Name, add a description, and then click Publish.
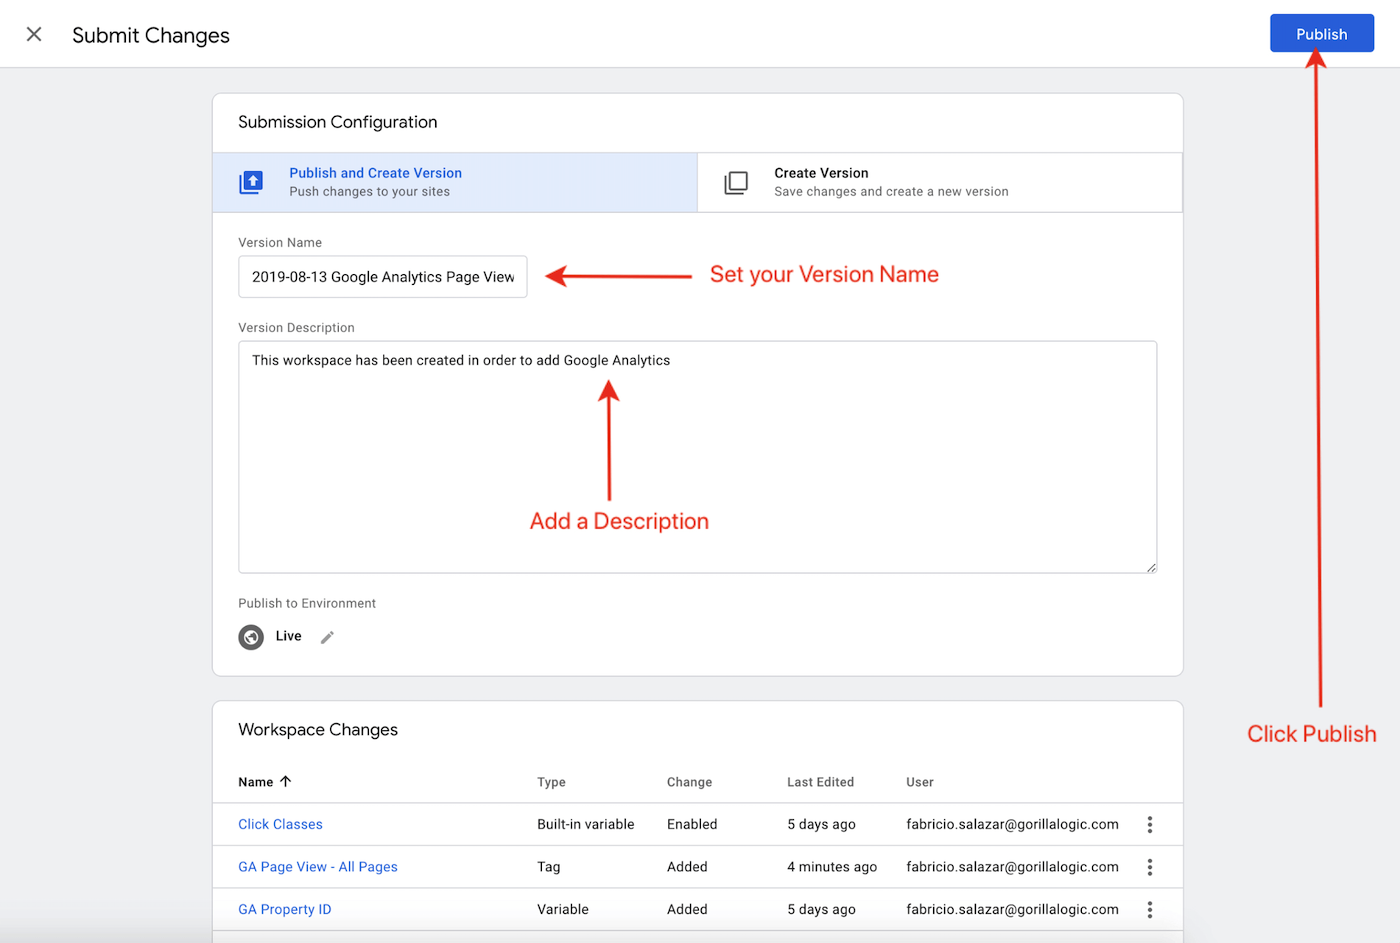
Congrats! You have completed this Google Tag Manager tutorial and have built your first GTM setup!
You Should Use GTM, Even If You Don’t Like Working with Tags
GTM has many benefits, such as fast deployments and versioning; another important benefit is that GTM is free.
As developers, we may sometimes avoid working with tags. I encourage you to reconsider. When you use GTM, you can help improve the way your organization gathers information about how users behave on your website or mobile app, and this can positively impact your business.


